
Quick Summary
To replace stair railing, first decide whether the full railing or only the spindles need replacing: if the handrail moves, replace the whole system, but if only a few spindles are loose, replacing those is enough. Then gather your tools, remove the handrail before the posts and spindles, and install new posts before attaching the handrail.
- Grip the handrail and push in several directions; movement means replace the full railing.
- If most spindles are wobbly, the top and bottom rails have likely loosened too.
- Shut off power at the breaker and confirm the circuit is dead before removing fasteners.
- Build a temporary guard from 2×4 lumber on the open side during removal and installation.
- Confirm handrail height and baluster spacing with your local building department before cutting.
Table of Contents
- Deciding Whether to Replace the Full Railing or Only the Spindles
- Tools, Materials, and Fastener Checklist
- How to Remove the Old Handrail, Posts, and Spindles Safely
- How to Install a Stair Railing to the Wall and Fit New Posts
- Replacing Stair Spindles Without Removing the Handrail
- Choosing an Indoor Stair Railing Kit and Troubleshooting Common Problems
- Frequently Asked Questions
Deciding Whether to Replace the Full Railing or Only the Spindles
Most replace stair railing jobs come down to one question: is the handrail still solid, or are only the spindles loose?
Start with the handrail. Grip it and push hard in several directions.
Next, count the loose or damaged spindles. If it is just a few, replacing only those works well.
- Replace spindles only: handrail is firm, and a few balusters are loose or cracked.
- Replace the full railing: the handrail moves, the newel post rocks, or the rail is damaged.
- Call a pro: the stairs are curved, the railing is steel or glass, or the wall structure looks weak.
Watch out: a newel post that rocks can pull out of the floor under load. Do not wait on that repair.
Tools, Materials, and Fastener Checklist
Gathering everything before you start prevents mid-project hardware store trips. Most US stair railing jobs use common tools many homeowners already own.
Tools
- Cordless drill and driver bits
- Pry bar and utility knife
- Tape measure and level
Materials and fasteners
- Replacement handrail, balusters, and newel posts
- Rail brackets rated for the load
- Structural wood or lag screws
Before ordering parts, measure twice: stair angle, railing length, and handrail height all affect the parts you need. If you are unsure which kit fits, a railing estimate from a supplier can confirm measurements and list what is included.
The article lists the tools and materials to gather before starting, grouped by category.
| Category | Items | Note |
|---|---|---|
| Tools | Cordless drill, pry bar, miter saw | Common tools many homeowners own |
| Tools | Tape measure, level, stud finder | Measure twice before ordering parts |
| Tools | Pilot-hole bits, sander, wood filler | For prep and finishing |
| Materials | Handrail, balusters, newel posts | Confirm stair angle and length first |
| Fasteners | Rated brackets, structural screws | Brackets must be rated for the load |
| Fasteners | Construction adhesive, primer, paint | For bonding and finishing |
How to Remove the Old Handrail, Posts, and Spindles Safely
Removal is the riskiest phase of any replace stair railing project because the stair edge is open and old fasteners may be weaker than they look.
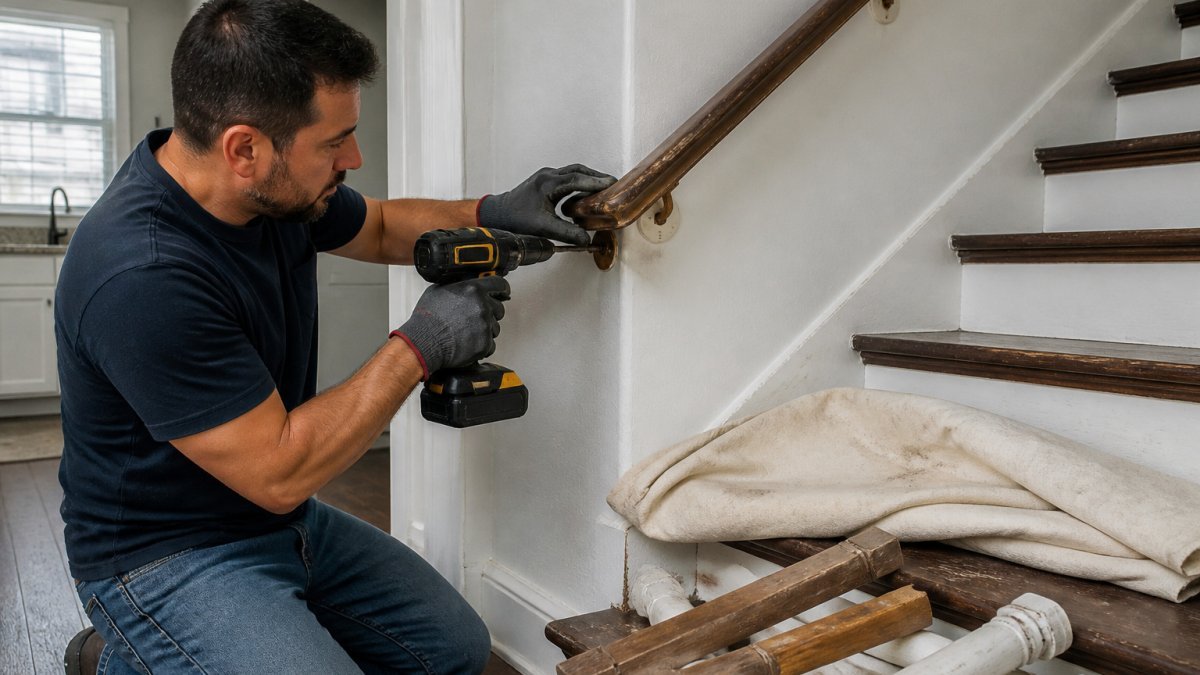
Before you touch a fastener
- Shut off power at the breaker to any outlets, switches, or low-voltage lighting within reach of the stair, and confirm the circuit is dead with a non-contact voltage tester.
- Lay a drop cloth on the treads and landing to catch screws, splinters, and paint chips.
- Have a second person on the stairs or at the top landing. Removal is a two-person job on any stair with more than a few steps.
Remove the handrail first
The handrail ties the system together, so it comes off before the spindles and posts. On a wall-mounted rail, back out the bracket screws.
Watch out: a handrail that feels solid can still be held by only one or two fasteners after years of movement. Keep a hand on the rail until it is fully free.
Pull the spindles
Most wood spindles sit in drilled sockets or shallow mortises at the top and bottom.
Take out the newel posts last
Newel posts are usually bolted to the floor framing or to blocking inside the stair framing.
Temporary Fall Protection During Removal
Once the handrail is off, the open side of the stair is an unprotected edge. Keeping a guard in place also makes it easier to plan how the new railing will meet the stair, a consideration that carries through bespoke staircase manufacturing.
- Build a temporary guard from 2×4 lumber and clamp or screw it to the stair framing on the open side. A midrail and a top rail at roughly handrail height give you something to grab.
- If a temporary guard is not practical, keep a second person stationed at the top of the stairs whenever the edge is open, and never leave the stair unattended with the rail removed.
- Keep the treads clear of tools, cutoffs, and loose fasteners. A screw underfoot on a stair is a fall waiting to happen.
If the stairs are the only path between floors in an occupied home, plan removal and reinstallation for the same day so the open edge exists as briefly as possible.
How to Install a Stair Railing to the Wall and Fit New Posts
Installation starts with the posts, because everything else attaches to them. Set the newel post first, then fit the handrail to it, and confirm code requirements before you cut anything.
Set the newel post
Mark the post location on the floor and confirm it lines up with your planned handrail height.
Attach the wall-mounted handrail brackets
Find the studs with a stud finder and mark them. Screw the brackets into the studs, not just the drywall.
Measuring Stair Angle, Railing Length, and Handrail Height
Accurate measurements make the difference between a tight fit and a rail that gaps at the joints.
- Measure the stair angle with a protractor or a digital angle finder. Record the angle of the stair nosing line, not the tread surface.
- Measure railing length along the slope, not straight across. Add a few inches of waste for angled cuts.
- Measure handrail height vertically from the stair nosing to the top of the handrail.
Code requirements to verify before you cut
Most residential stair handrails fall in the 34-to-38-inch range above the stair nosing, but the exact figure, measurement method, and exceptions vary by jurisdiction and occupancy type. Confirm the applicable requirements with your local building department before installation. Items most commonly checked at inspection include:
- Handrail height: measured vertically from the stair nosing to the top of the rail, with a permitted range rather than a single number.
- Graspability: the handrail profile must be graspable, typically a circular cross-section of about 1-1/4 to 2 inches or an equivalent shape with a perimeter in the graspable range. A flat 2×4 cap is generally not considered graspable.
- Continuity: the handrail should run continuously along the stair, with ends returned to the wall or terminated in a way that does not create a catch point.
Codes are updated on a cycle and local amendments are common, so the version enforced in your area may differ from the model code.
Cut the rail at the angle using a miter saw, and dry-fit everything before you glue or screw it down.
Replacing Stair Spindles Without Removing the Handrail
If only the spindles are loose, you can often replace them without taking the whole rail down. Pry the old spindle out from the bottom, since the top usually sits in a socket.
Set the new spindle in place and secure it at the top and bottom. Use a bit of construction adhesive for extra hold.
A common mistake is buying spindles that are too long. Always measure the old piece before cutting.
Choosing an Indoor Stair Railing Kit and Troubleshooting Common Problems
Indoor kits make a full replacement easier because parts are pre-cut and labeled. Look for kits that include all brackets, spindles, and fasteners, and check that materials suit your home. Wood looks warm but can warp in humid areas, while steel and aluminum hold their shape longer.
Some problems come up again and again:
- Uneven stairs: Shim the posts or the bottom of the spindles until the rail sits level.
- Angled cuts that do not line up: Recheck your stair angle and cut a test piece first.
- Loose posts after installation: Add more fasteners or switch to longer structural screws.
If the problem goes beyond a quick fix, hiring a professional is worth considering when the stairs are high-risk or the structure looks damaged.
Frequently Asked Questions
Is it difficult to replace a stair railing?
Replacing a stair railing is a moderate DIY project. The hardest parts are measuring the stair angle accurately, cutting angled rails with a miter saw, and securing posts so they are plumb and solid. Someone with basic carpentry skills and a helper can usually complete a straight staircase in a weekend. Curved or landing-heavy staircases, and any project involving structural attachment to masonry or steel, are better left to an experienced installer. If the new railing will be permanently fixed to the wall or floor, confirm the attachment method with your local building department before you start.
Can you replace stair spindles without removing the handrail?
Yes, in many cases you can. Balusters, also called spindles, are often held at the top by the handrail groove and at the bottom by a tread or base rail. To replace one, cut the old spindle in the middle to relieve tension, pry out the two halves, and slide the new spindle into place. Check that the replacement is cut to the same length and that it sits square and plumb before you fasten it. If the handrail is loose or the spindle is glued in a fixed groove, you may need to remove the rail section instead.
How do you attach a stair railing to the wall?
Wall-mounted handrails are typically fixed with brackets anchored into wall studs or solid blocking. Locate studs with a stud finder, mark the bracket positions at the height specified for your project, and pre-drill pilot holes to prevent splitting. Use screws long enough to reach solid framing, and confirm that each bracket is level before tightening. Where studs are not available, use appropriate anchors rated for the load. Handrail height and bracket spacing should follow the requirements of your local building code.
What is the 4-inch sphere rule for stair railings?
The 4-inch sphere rule is a common residential safety requirement that prevents a 4-inch ball from passing through any opening in the railing. It keeps small children from falling through or getting their heads trapped. When you replace balusters, measure the gaps between them and confirm they meet this limit. Requirements can vary by jurisdiction and project type, so verify the current rule with your local building department before you finalize the layout.
